
Here's the long story of my build-up thread for my Car PC. It's in a diary style to start with and i'll update it when the car pc is finished.
In The Beginning
Here's my system specs so far.
| Case | Morex Cubid 3688 (silver) |
| Motherboard/CPU | Via Epia MII 12000 |
| RAM | 512MB PC2100 |
| PSU | M2-ATX |
| HDD | Samsung 60Gb SATA 2.5" |
| DVDRW | Lite-on DVDRW Dual Layer |
| Screen | Xenarc 7" Touchscreen |
| Keyboard/Mouse | BTC mini wireless keyboard with integrated mouse |
| GPS | BU353 USB GPS Receiver - SiRF Star III |
| On/Off | Vandleproof Stainless Steel Switch (maplin) |
| Amp | Shark V3 400W |
| USB | 4 Port USB Hub, 2 extension cables |
| Radio | Silabs USB Radio |
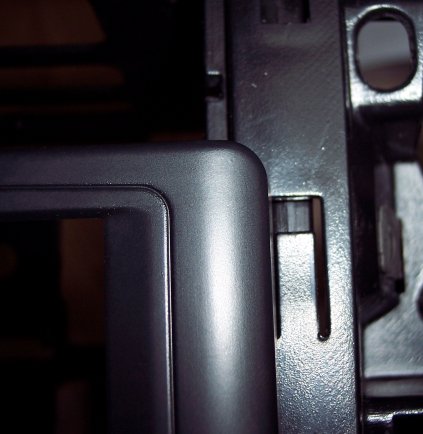
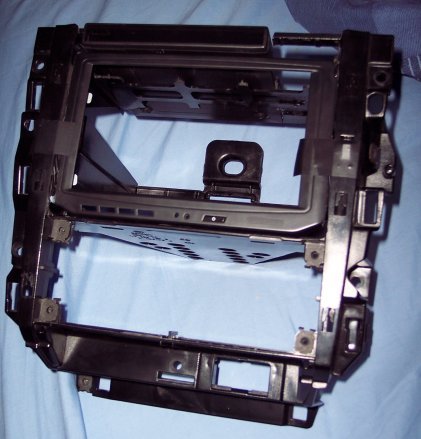
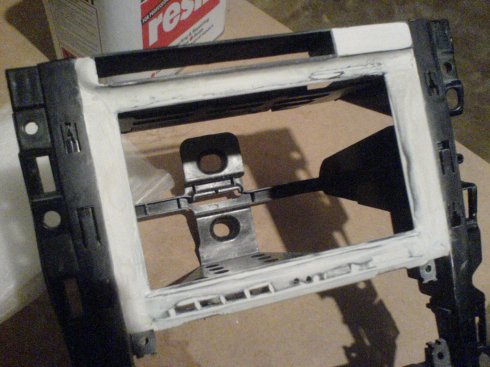
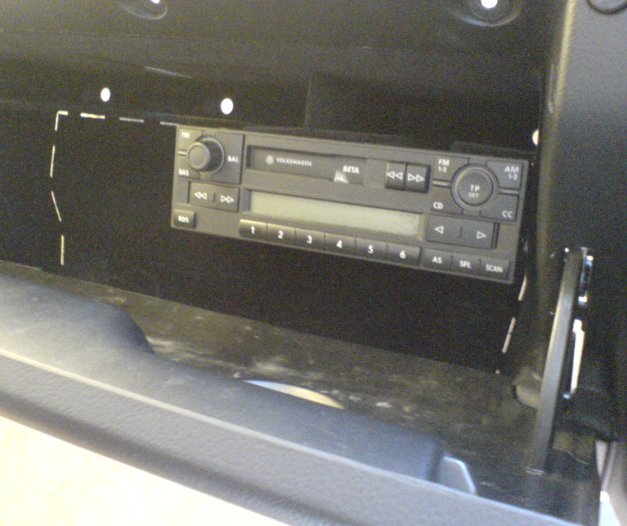
I took a radio cage from a VW golf in a scrapyard as the golf and bora interior parts are interchangable. I decided that it was better to have a spare cage to practise on first. It turned out that the practise cage is now the one i'll be using in the car. I got a spare housing from armin at Digital WW for about £15 posted. Top notch service. As you can see below, the screen was pretty close to fitting but was slightly too wide.

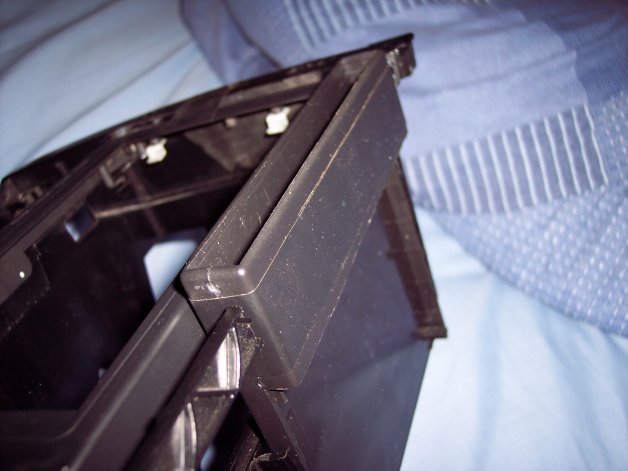
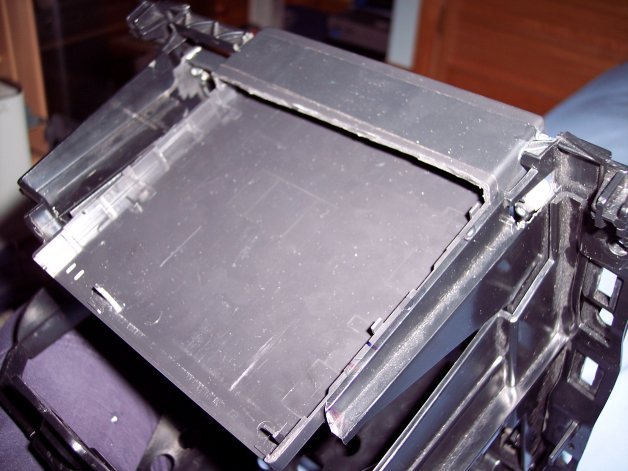
This is where the dremel comes in. I placed the slim slot loading dvd drive into the space above the screen housing to make sure the height was ok. There was only about 1mm to trim off the housing to get the height correct.

So here it is all taped and glued in place. I used superglue to hold it where i want it so that the filler could be done without the housing sliding or moving any way.
I noticed that the filler may cause problems with the DVD drive and I also thought it'd be a good idea to make it interchangable to futureproof the setup a little. I got a USB slimline caddy from Linitx and hacked it up a little with the dremel to make it so that the caddy could be molded in but still be opened and the drive could also still be detached. This is a simple mod as you can see.
Then came the filling part. After some thinking I used gripfill for this part to fill the main gaps. Turned out quite well. The gripfill is hard as nails and it has a little flex when it's done. I then used P38 to finish it off and smooth out around the buttons and edges.
It's hard to tell from the picture but it's not exactly perfect. You'll see why in a second.
Here's the explaination of me not being too fussy about the filler being exactly smooth. I'm using black fake suede to match the upholstering job i'm doing on my headliner and pillars at the minute. I used the same upholstery glue to stick the suede to the screen housing.
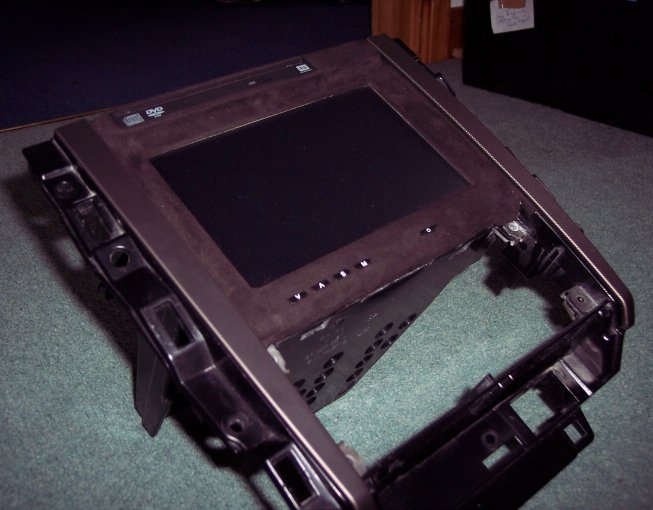
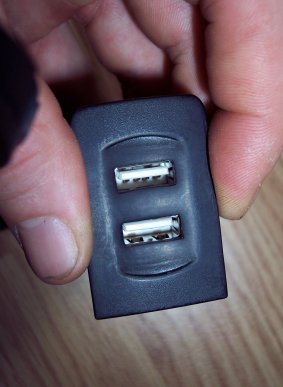
While i was working with the gripfill i fabbed up a couple of USB slots for the dash. These will be great for the keyboard, phone, usb memory sticks, etc etc.
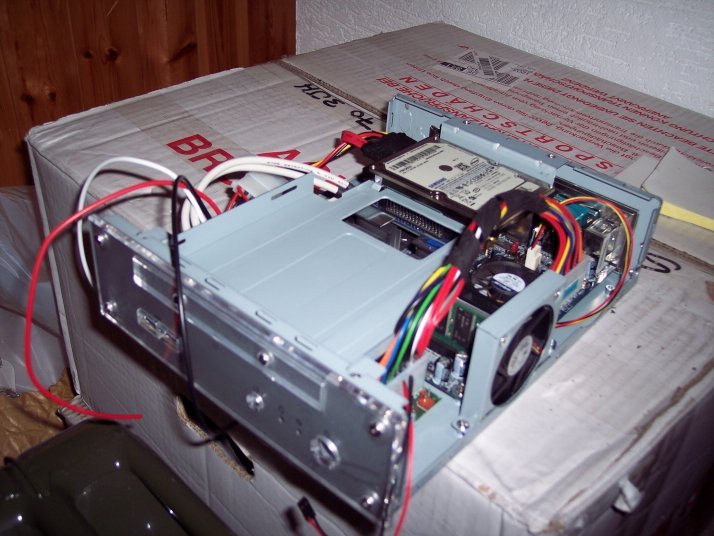
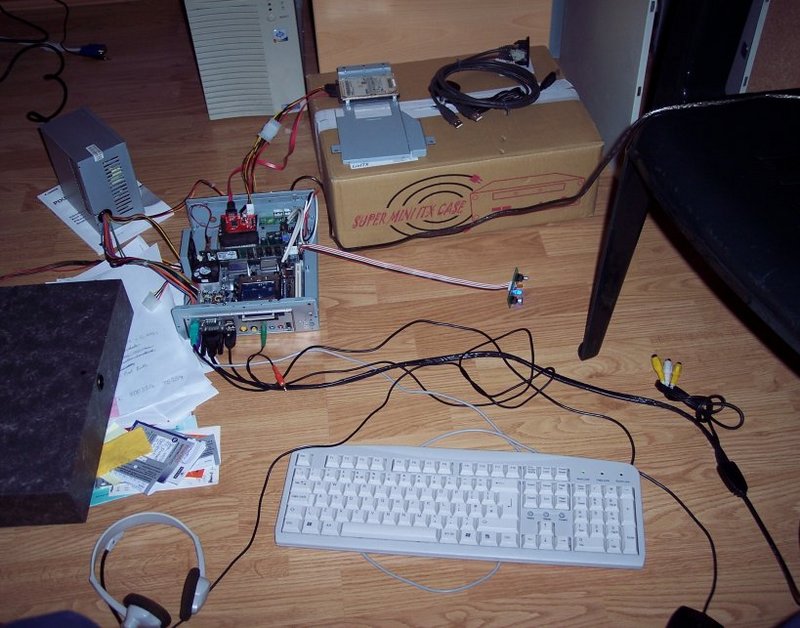
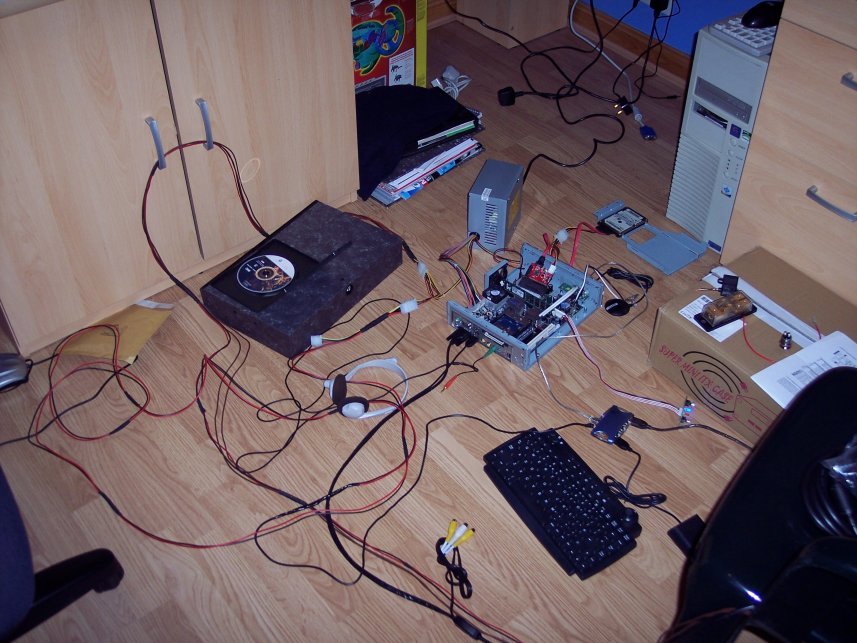
Here's a little shot of my test setup.
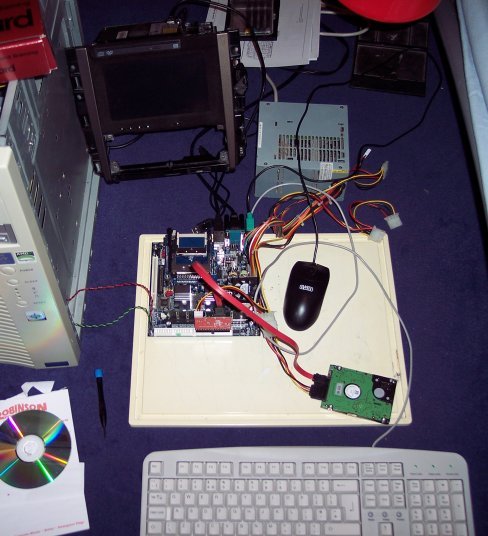
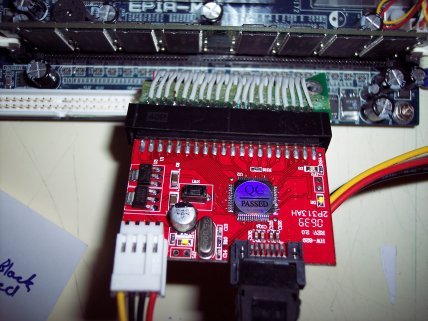
And my motherboard. You can see the SATA controller plugged into the IDE port here to make the SATA laptop drive functional.

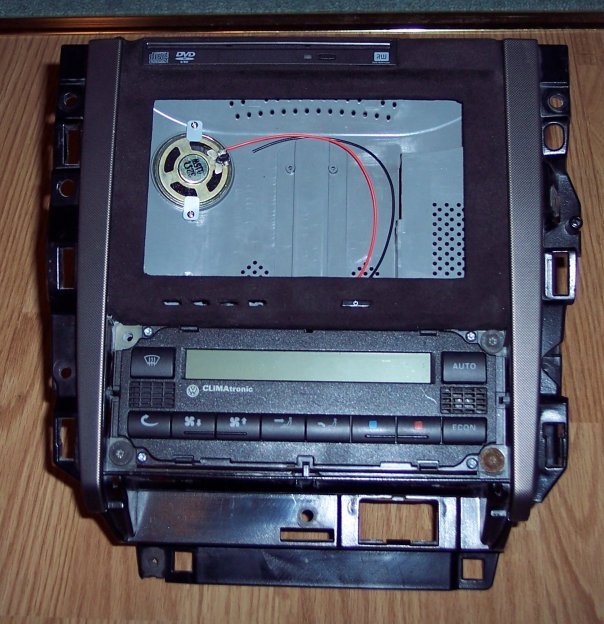
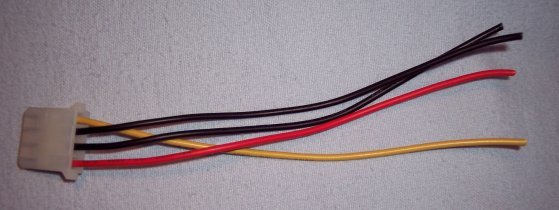
And here's how my screen will be powered. I'll be soldering this up sometime today or tomorrow. with the power for my DVD drive as well.
And a quick pic of the wireless keyboard and integrated mouse.

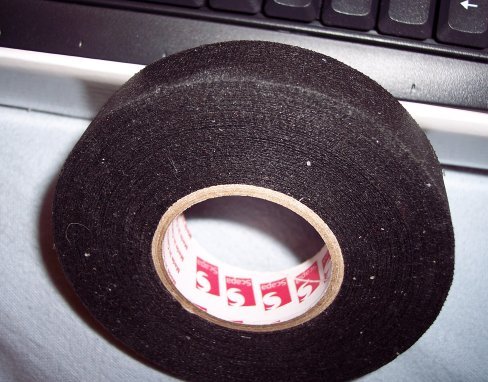
And here's a great tip for wrapping wire. This cloth tape is the sort used in cars and stops the wires rubbing or wearing down against stuff. Excellent tape and very versatile.
Thanks to:
- Johno12345
- Norbie
- Armin
- Scouse Monkey
- Enak
- Turner Brown
- Lez
- DaveC
And anyone else I forgot to mention. Also there will probably be more people to add in here when it's done.
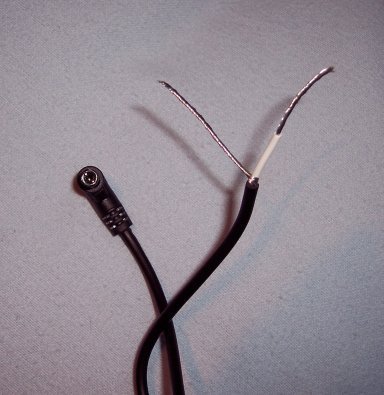
Just finished soldering the adapter and took a couple of quick snaps. Was pretty easy to do. I'll need to seal it up and test it out tomorrow. I'm pretty confident in my soldering so hopefully there shouldn't be any hitches.

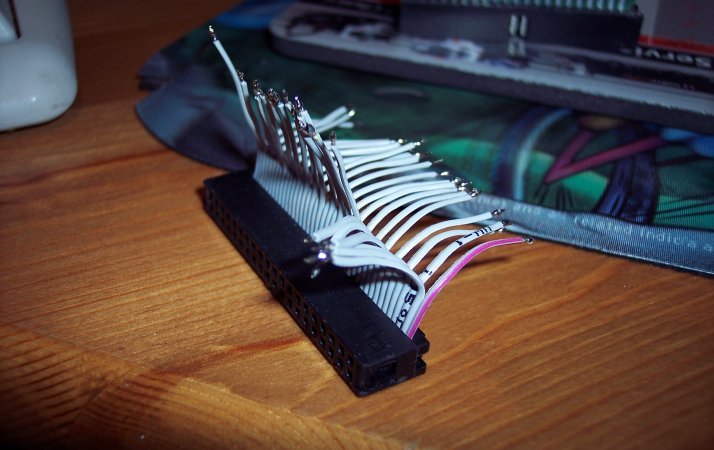

Did a quick test there now and everything is working perfectly. The adapter allows me to have that extra few mm needed to use whatever height of case I want now. Here's a couple of pics of how it connected up. I'll be experimenting to see what's the best way to fold it either over the power board or over the top of the RAM but either way it'll do the job. I just need to get a case ordered now.

Got the stuff from linitx today - once again, great service and thanks Chris.
I finally decided on the Morex Cubid 3688. I took out the PSU that was inside and put in the M2 power supply. It is a bit of a squeeze but i reckon it fits pretty snuggly and just enough room for a few extras if I ever need anything else installed. I took out the switches from the front of the case and I may use them in the dash. Haven't decided just yet.
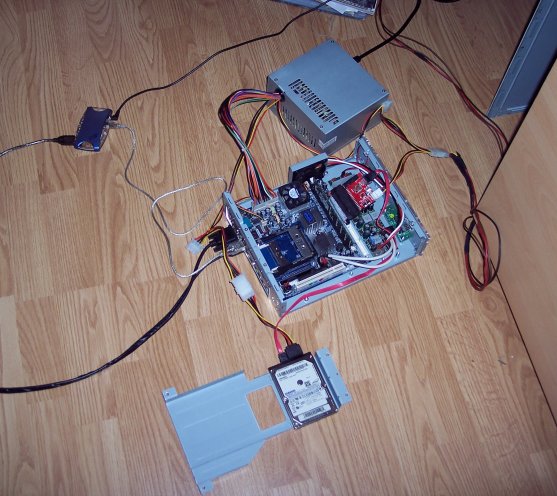
Anyway, here's a couple of pics of the components all tucked in.
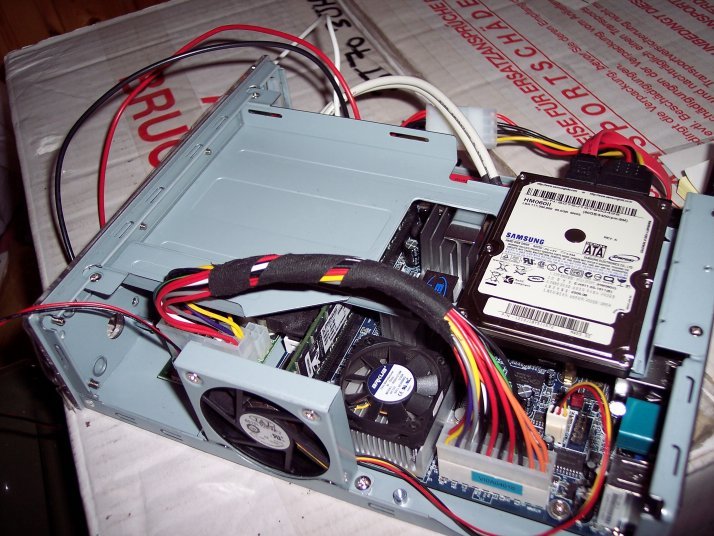
And the SATA drive screwed to the shelf inside the case. You can see below the Cardbus and PCMCIA reader which i'll probably be setting up to boot windows from later this year.
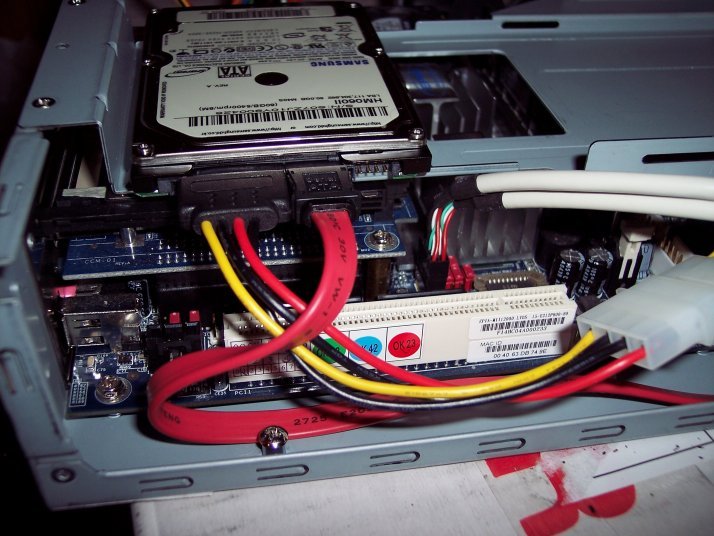
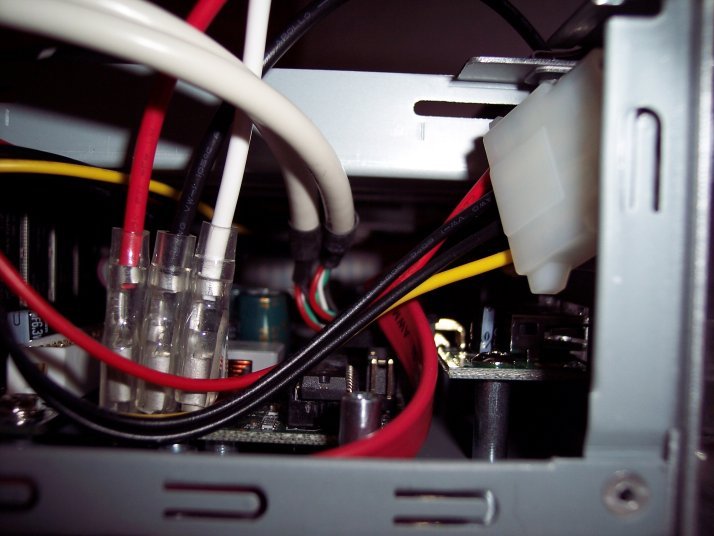
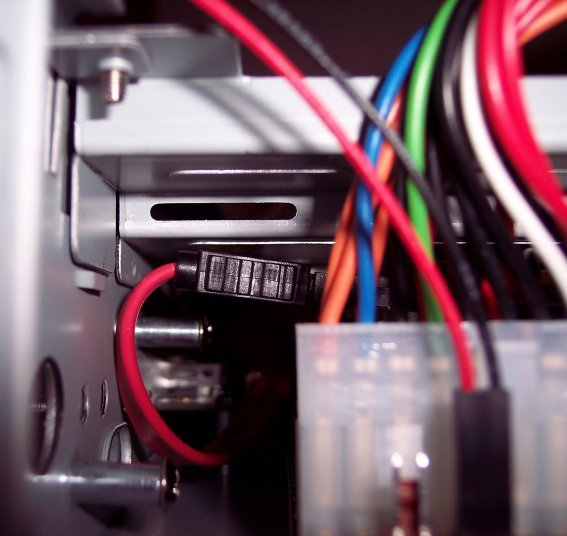
And this is where I managed to squeeze a load of wires though past the power supply.
And you can see from this where my SATA cable just about fits in. So the adapter worked out perfectly. I couldn't bend it the other way as the RAM was in the way and it was about an inch and a half too tall to stick straight up without the piece I soldered on.
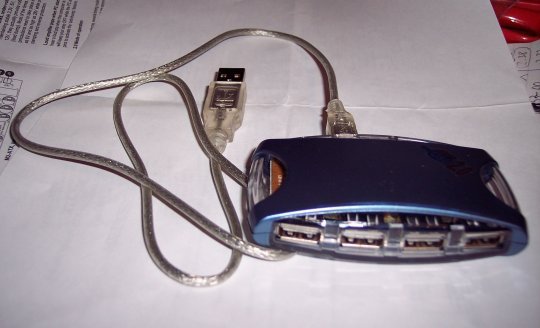
And the USB hub I'll be using. I'm not sure where to put it now because i've got the USB lines hooked up to the front of the case as well so I have now got 4 on the case and a 4 port hub as well. Should be handy for extra devices and stuff but i'l worry about that at a later date. Now I just need to work out how many USB lines I want to run to the boot. And what devices will be running from the hub.
So on my to-do list ias work out the USB wiring, AMP wiring, and power supply wiring. And I also need to have a look at the on/off switch and rest to see if i can butcher them up a little and maybe get them incorporated into the dash.
I'm going to be using a distrubution block (cheers Saj) and wiring in a 30A fuse for the Amp and a 10A inline blade fuse for the computer (that should be an interesting wirey mess). I'm going to try and get it all packed inside the distribution block. Tonight I might just use a home PC power supply and get the mini-itx fired up.
As for software, I'm now running Vista and Origami. I need to play about with origami more to see how it all works. I'm also going to need to look carefully at drivers. I think I have all the drivers I need including the Via Epia motherboard drivers (untested until later). When I'm sure I have all the drivers I need, I'll have a go at trimming vista down to it's bare bones of what I need it for. This will probably involve Vlite as it's easier than cutting stuff out of a full installation.
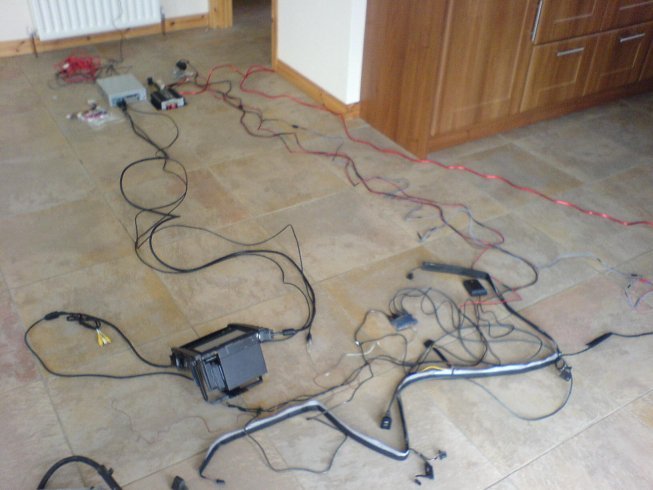
All I need now for hardware is wiring through the car, I think I have everything else. It's time to get the measuring tape out and get a few extension leads from ebay. One problem I have found with the power leads is that they seem to like being kept out straight. I had the lead for my dvd drive coiled up and the drive misbehaved the whole time. I'm not sure still whether to blame it on the power board on the back of the drive enclosure or on the lead itself but that's something I need to sort out in a full dress rehersal (all devices plugged in and working in the house and laid out at full length of cables). I'll also have to make some sort of enclosure to house the Amp and PC. I'll be going for something nice a small and ventilated tucked in a corner of the boot because I hate the big show style ICE thing.
Here's a few pics of my setup at the minute with vista and the origami software. What a complete nightmare to get installed but it's a really good piece of kit.
My wiring and distribution block will hopefully be sorted this weekend. As you can see, it won't be conventional :)
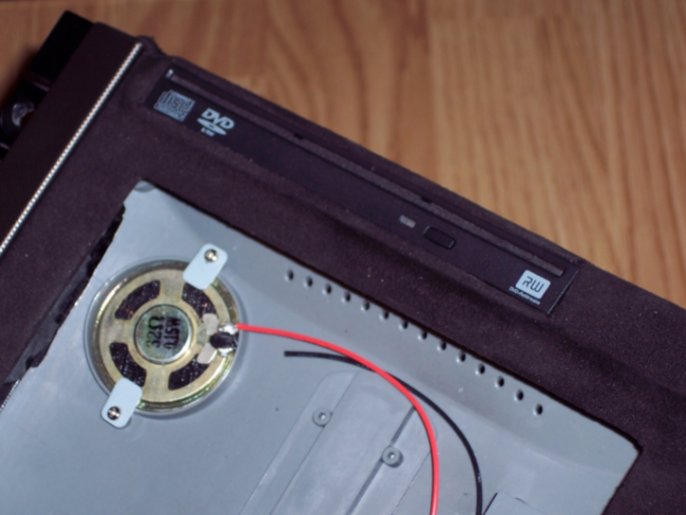
My screen and dvd drive. Could say it's finished but it needs a little trim around the dvd drive to help finish it off.

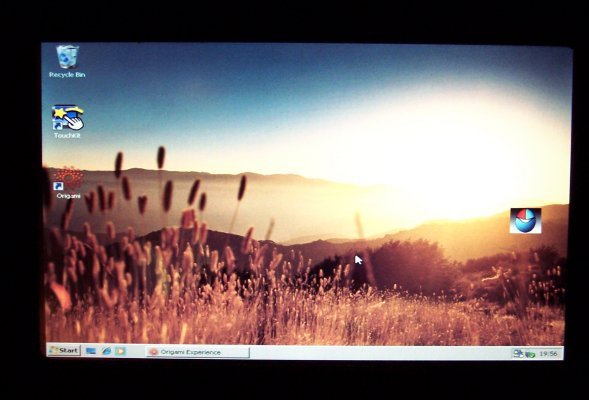
The vista desktop, i got rid of any flashy nonsense that was slowing it down.
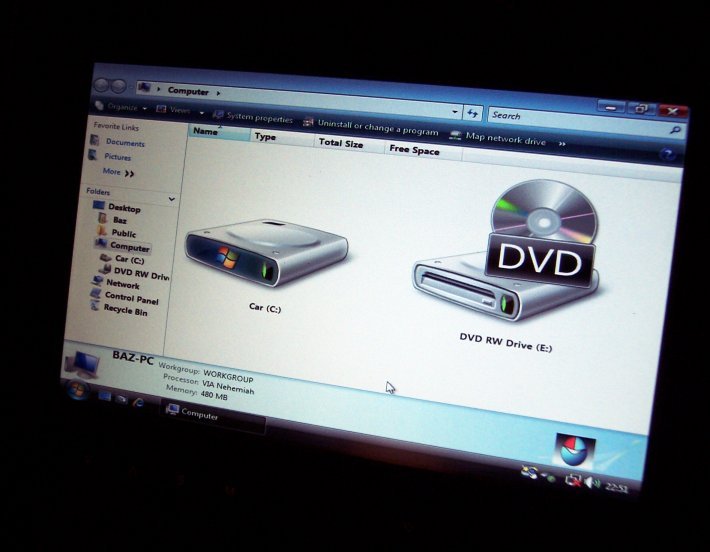
This is one of the coolest things about vista. Check out the size of those icons. That can be done in any folder with any icons.
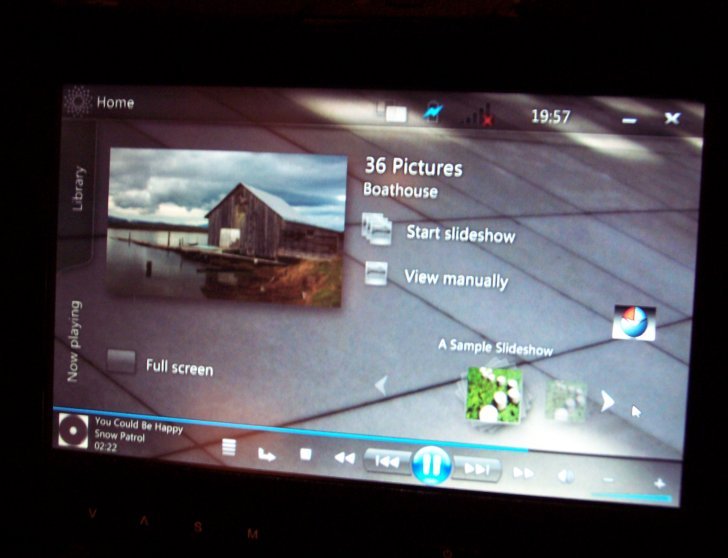
Here's the origami home page.

And one of the origami music selection pages. As you can see, loads of options and ways to show and order the music.

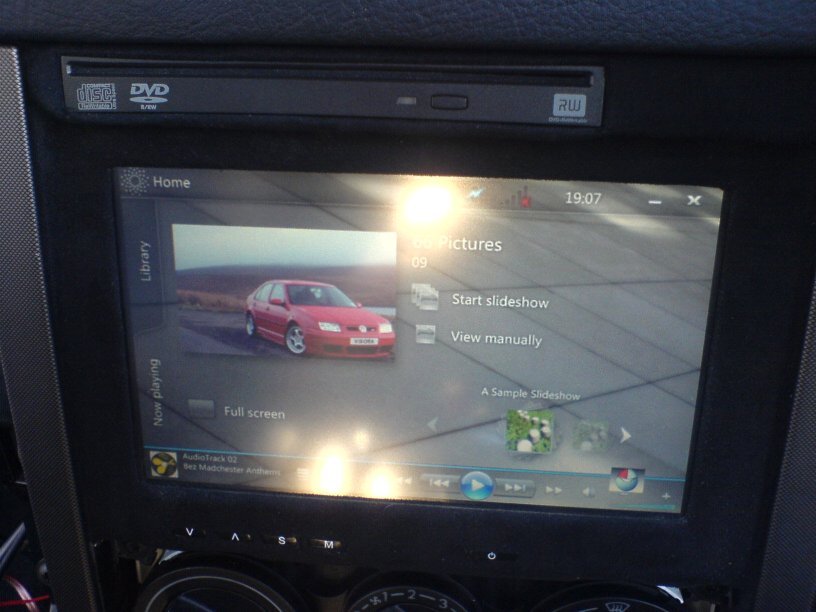
And the origami pics viewer. This is a very good feature and again has lots of ways of storing and ordering the pictures and also has a few options for different types of slideshows and pic viewers.
Things are going reasonably well at the minute.
I've just ordered a 3M VGA extension cable and 2 x 3M USB extension cabes as well so as far as I can see, all I need to to sort out my speaker and amp wiring. I have an amp wiring kit so it's just a matter of getting the time to get it cracked open and get the car taken apart once again. The distribution block will be fed by an 8 gauge wire with an inline 40A fuse (I know - but the best solution I could get as I can't get a 40A AGU fuse). In the distribution block will be an normal blade style 10A fuse and a 30A AGU fuse. That may involve some inventive soldering and bracket making.
Here's my wire routing plan:
Headliner (currently off getting recovered) = 2 x USB and a VGA lead.
Left Inner Sill = Power lines in from battery and up to PC components.
Speaker wiring will be routed down each side where it would normally be on the floor and then up the front of the rear arches and along the solid parcel shelf to the Amp location.
I might just bung the PC into the car and then worry about fixing it permanently to some sort of housing when it's all done. I'd like to make something nice and stealthy and not get in the way of my golf clubs in the boot.
I need to fix my fuse box in the car as well due to a dodgy screw which ended up breaking a piece of the bracket that holds it on. Lots of fun for some weekend when I get a chance. Within the next week or 2 if it would stop raining I expect to have some or all aspects of the PC fitted. I intended to fit a load of other mods while I was doing it but we'll wait and see.
Stuff is a happenin. :) About time too.

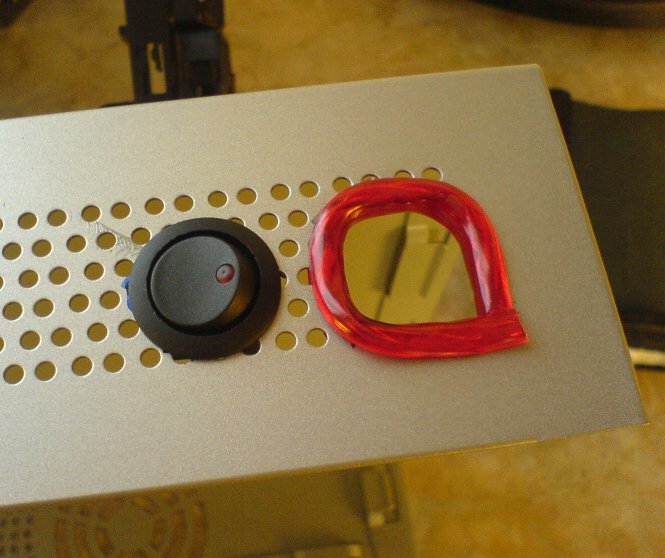
I got my backup on/off switch installed today. I think it worked out quite well. All the dust you can see in the pic was from the drilling and careful dremelling needed to get it in, funny how the outside of it looks blue as well because it's silver?? I put it in the ashtray to stick with the stealthy theme. Also did a bit more wiring work today with the amp wiring and power lines. I need to sort out my ground points tomorrow so hopefully should have another wee update soon.


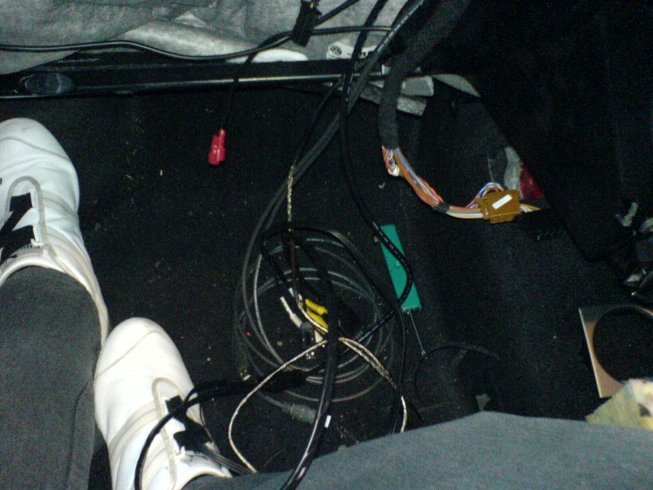
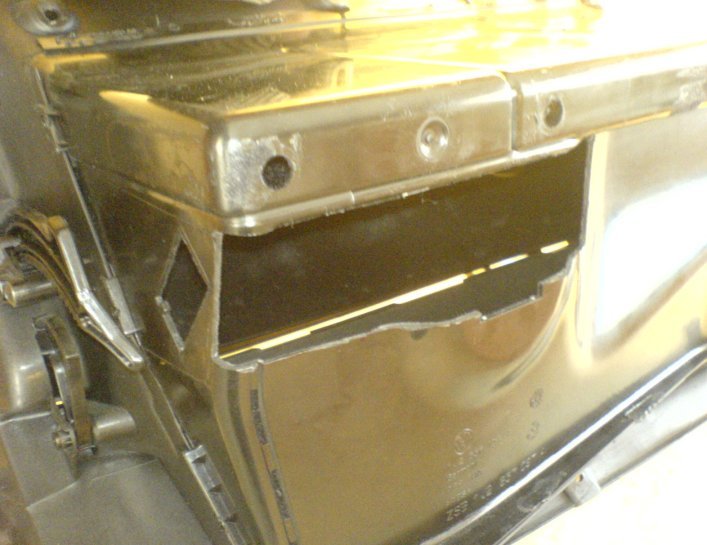
Here's my new update. Speaker wiring has been attached to an ISO extension lead that goes into the back of the head unit. This means I can take it in or out with or without the headunit in. I've cut a hole in the back of my glove box which is pretty damn perfect for my existing head unit for a backup. The glovebox closes easily and there's still plenty of room for other stuff. It's also on a 2 Channel amp and with a little easy soldering I can make it work with a 4 channel amp. I'l be running the speaker cables up the passengers side with all the rest of the stuff. I don't expect to get any noise or interference problems but if i do they can be easily moved.
The distribution block and associated wiring has also been made and terminals crimped and soldered...etc etc.
I decided to go ahead and fit the fabricated center console today. Space was at a premium as I found out. I got it sorted though with a little trimming and the most difficult big was working with the cd drive. The USB and power lead coming from the back were sticking out too far and I decided the only way around it was to hardwire the cables directly to the tiny adapter board. The solder joints were all perfect (as always ;)) and hopefully it'll work because I couldn't be bothered taking it back out again.
My next plans are for the earth in the boot - if I can find it, and to get the USB hub in the glove box organised in some sort of tidy way which won't be easy as it has power and mini usb in one side and 4 USBs in the other side.
I still need to make some sort of enclosure to house all this in the boot. I'll worry about that ni due course. I have all the materials and tools at hand so shouldn't be too tough to put something together.
I'm just adding in a few pics to keep the diary rolling.
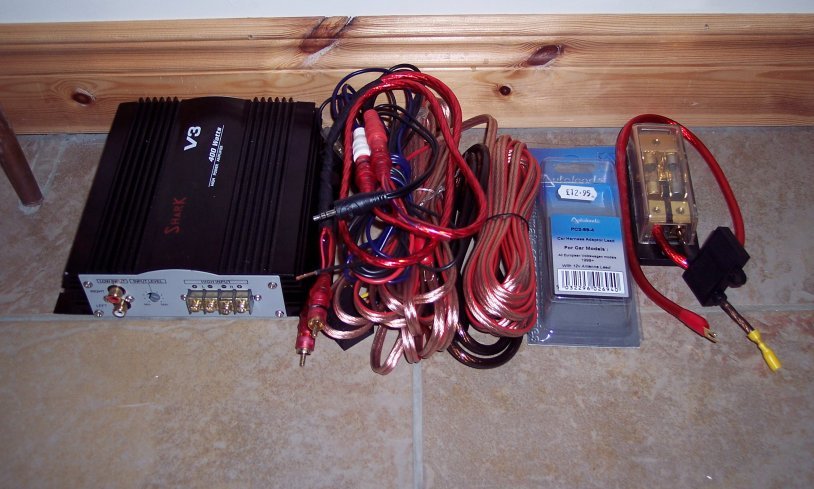
Here's my amp and all the wiring (or most of it) needed to get it hooked up.
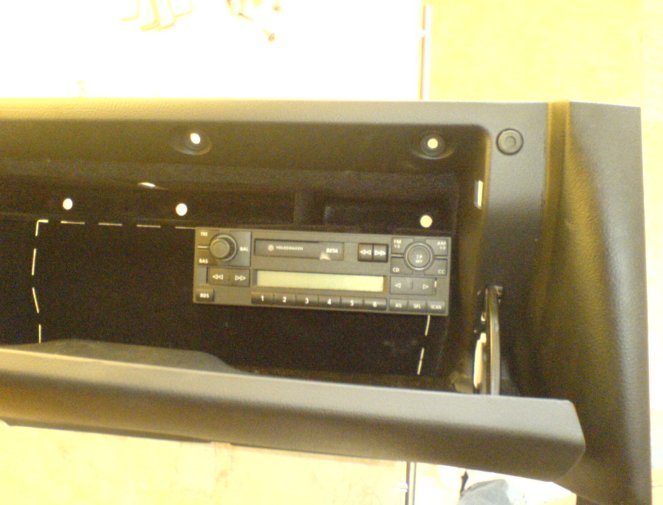
Here's something that turned out better than I thought it would. This is where I'm putting my existing headunit. As you can see it fits pretty well into the glovebox. I need to trim and tidy it up a bit. I had to cut a little bit out of the back of the glovebox to let it slide back enough to let the door close and plug the wiring into the back of the radio. I love my dremel - don't know what i'd do without it.
Tried to get some stuff done but need to work on a delivery geezer here and my tools aren't in my house either.
Here's a couple of pics I took yesterday any way.
The mods I made to the side of the case for the overall cut-off switch and the hole for the wiring to come through.
And the Earth point I found behind the rear passengers arch.
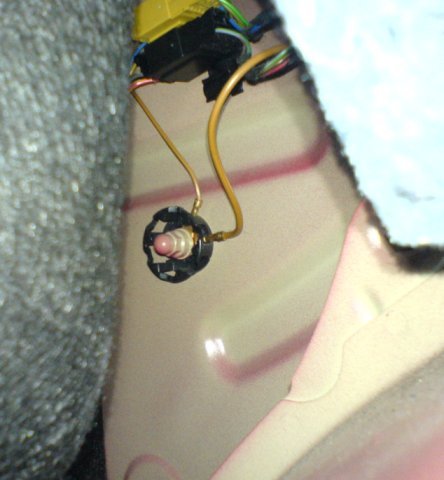
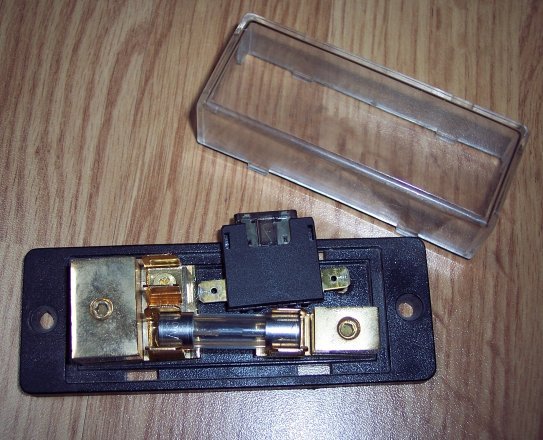
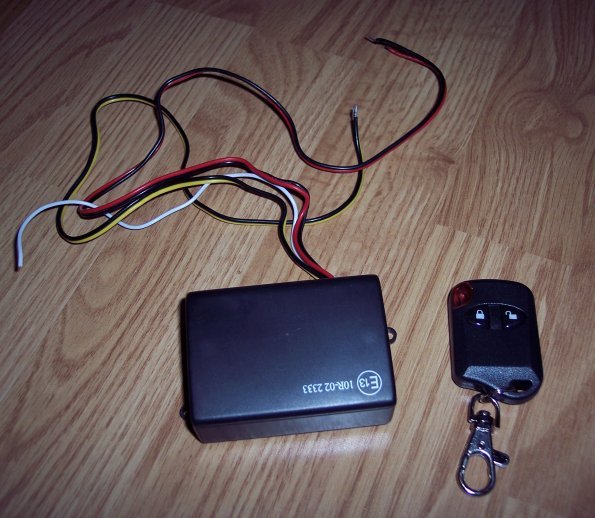
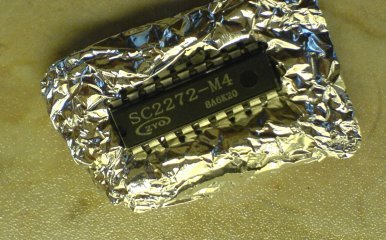
And here's the remote circuit which I'll be testing later. The new chip in it's suspect packaging.
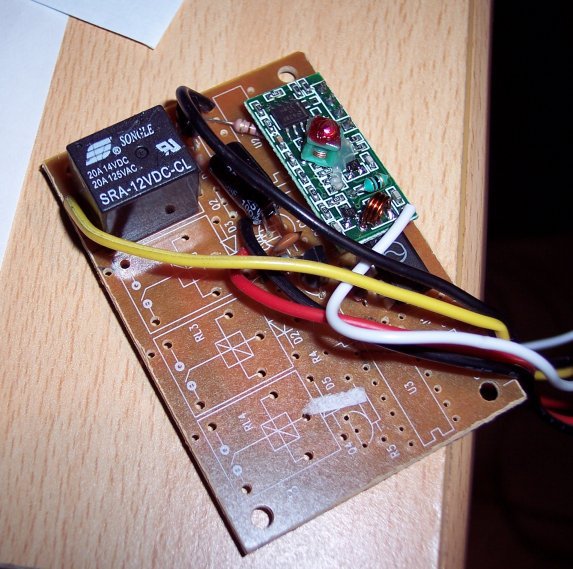
Old chip out.

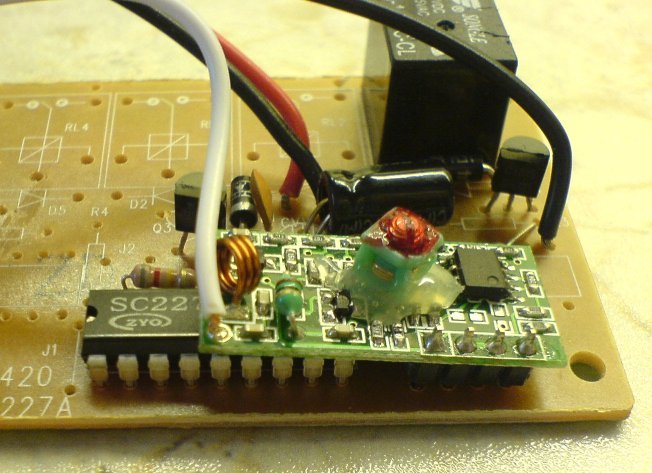
New Chip in.
OK yet another update.
I'm all up and running as the pics below show. I had a nice surprise when it didn't boot up first time. I blew a fuse when I accidently routed some unwanted current accross 2 wires. But anyway, all is reasonably well. the interference is something i'll need to sort out as it's pretty bad but I sort of expected that after ramming loads of wires together over the last couple of days. I'll try and sort out the source of the problem tomorrow but i'd put money on that it's something to do with the power wires running up to the dash for the ignition toggle switch. Hopefully, I can get a few problems ironed out tomorrow and get the stock head unit plugged back in so I can get some of the trim on. Only thing left to mention is that the momentary remote switch works perfectly.

ok, after this evenings tests I have eliminated all the interference problems by grounding the motherboard and case and using a ground loop isolator. The wireless internet is also working perfectly. The on/off switch in the ash tray is fitted and working as well.
I'm fed up to the back teeth with my grinding, clunking, banging and clicking slot loading dvd drive so I think i'm going to try a normal laptop tray loading drive to see if it's the dash fitment or the drive itself.
There's still loads of trim everywhere and I still don't have a box made in the boot to house it all but that'll come in due course.
I'll try and take loads of pics tomorrow after I hoover the half ton of grit and dust out of my car floor.
Baz
It's been a while since my last update but i've got a few little things to add.
I did a complete reinstall of vista by putting it on a memory key and doing an upgrade from there. I used V lite originally and to be honest, even though it had a lot of stuff taken out, V-Lite is a total waste of time and space. Vista runs tens times better as a full version and now just about everything works including a 4Gb memory stick which I'm using as a readyboost drive and it seems to have made a good difference. Now, I've only had a few hours to run a few things around and get some stuff sorted.
My USB hub seems to have taken a huff since the restart and there's not much happening through it so I need to work out what has gone wrong there and what drivers I need.
I also got my silabs radio which at the minute is picking up damn all but I haven't attached the car aerial to it yet so that'll be a good test for it.
Again, it doesn't work going though the hub but works fine plugged into the PC base unit.
Origami is still great for playing music. I haven't bothered with videos or anything like that as I haven't had to.
I still need to get a housing made to hold the PC and amp in the boot and I might get round to that this weekend.
I also have no DVD drive at the minute and could do with it mainly for moving stuff from the house to the car by cd and installing drivers. I'll hopefully get that sorted inside the next week as well.
I also got the new rims onto the car finally. The back is now 10m lower than when this pic was taken.
Got another small update to add as well. I swapped the touchscreen and USB hub leads on the back of the pc case and windows picked up the hub and completely reset the touchscreen settings. It was a bit hit and miss literally trying to get that configured again but got there in the end. I also took the car up the road a bit with the usb radio plugged in and I just set it at 99.7 and got a few murmours and mutterings amongst the fizzing and hissing so I have faith that with a full car aerial attached to it that I should be able to pick something up. I still have my headunit for backup but the high inputs aren't plugged in yet so it's on hold. I'll just have to stick with the 10Gb or so music I stuck on it earlier for a while.
I'm also more convinced than ever that the Readyboost on vista has made a big difference to it's speed.